When I designed the petals for the January A block, I didn’t take into consideration how that little fold at the tip of each petal was going to be appliquéd. Design first, figure it out later!
So I have worked out a way to do it and not go crazy dealing with that tiny piece of fabric. I am sure there are other ways to do it, but this seemed to work the best for me, since this blog is first about the designs, then about hand appliqué. If done by fusing or machine, I am sure there is a way to deal with tiny pieces of fabric. If you have another idea, please share your method with us.
Freezer paper templates of the tip are cut and applied to the “wrong” side of the fabric. With most batiks there is a wrong side, or a less nice side!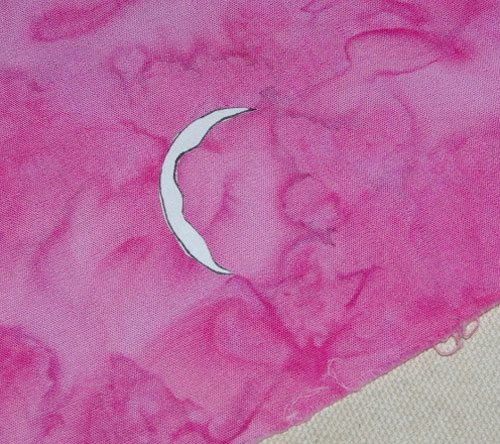 Trim around it, leaving the usual seam allowance, slightly less than 1/4″.
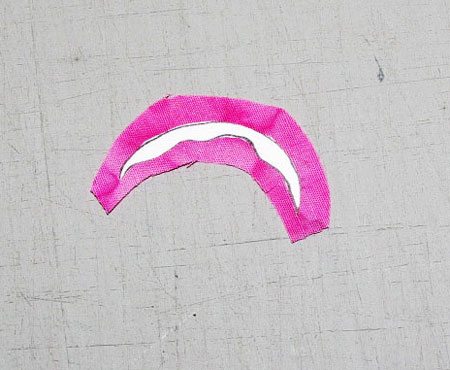 Then snip the inner curve, dampen snipped area with fabric sizing and press over the edge of the paper.
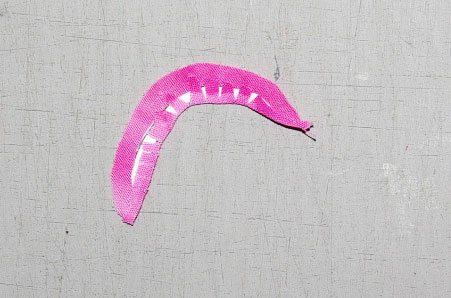 Baste and appliqué the petal tips to the “right” side of the fabric, leaving space for the petal itself to be cut out. In this way I am not handling TWO small pieces of fabric, at the same time, trying to make sure that the tip is placed properly.
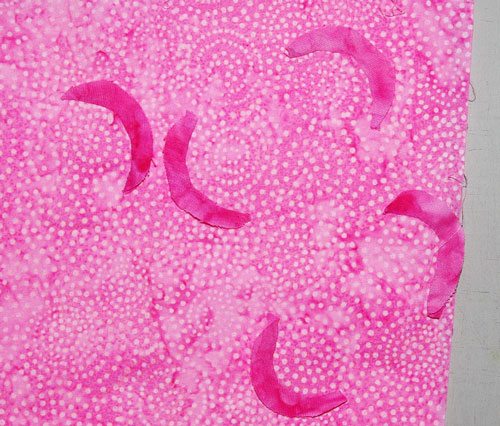 Once the tips are all appliquéd, turn the fabric over, place the paper template so it is covering the stitches. Hold it to a strong light, if necessary and you will see the edge of the tip fabric, don’t press in place yet. Draw around the template with a pencil. The black line is there, because the appliqué thread didn’t show, so that is just so you can see where the pencil line will end up.
 Cut out the petal leaving a generous seam allowance, it can be trimmed some more, once the paper template is in place.
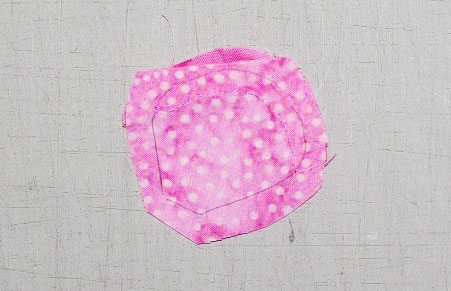 Trim the petal fabric including some of the clipped seam allowance of the tip fabric. You can trim away the pencil line that is under the tip fabric, leave at least 1/8″ from the appliqué.
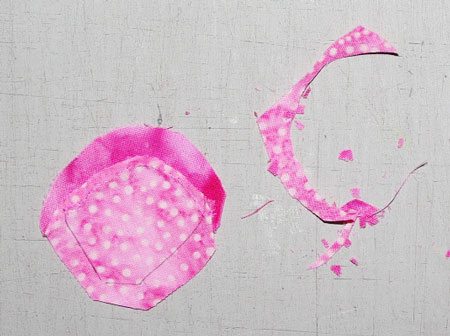 Press the paper template in place, aligning it with the remaining pencil line and trim any excess seam allowance.
 Finish by pressing the seam allowances over the edge of the paper.
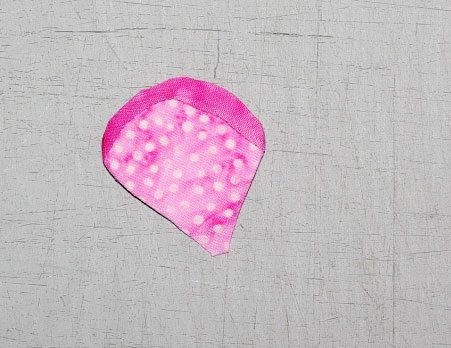
Each petal tip will be slightly different, but that is just fine, because they aren’t all the same in nature either. Any questions? Please do not hesitate to ask in the comment section below.
November Block of the Month at Craftsy
January “A” Block of the Month
February “B” Block of the Month
March “C” Block of the Month
April “D” Block of the Month
May “E” Block of the Month
June “F” Block of the Month
July “G” Block of the Month
August “H” Block of the Month
September “I and J” Block of the Month
October “K” Block of the Month
November “L” Block of the Month
December “M” Block of the Month


